
Maintaining plumbing systems is a task many homeowners face, and one component that often requires attention is the flexible pipe coupling. These versatile connectors are used to join pipes of different materials or sizes, allowing for movement and reducing the risk of leaks. However, like any part of a plumbing system, they can accumulate debris, mineral deposits, or even mold over time. Proper cleaning ensures longevity and prevents costly repairs. This guide breaks down the process into manageable steps, offering practical advice for Americans looking to keep their plumbing in top shape.
Understanding Flexible Pipe Couplings and Common Contaminants
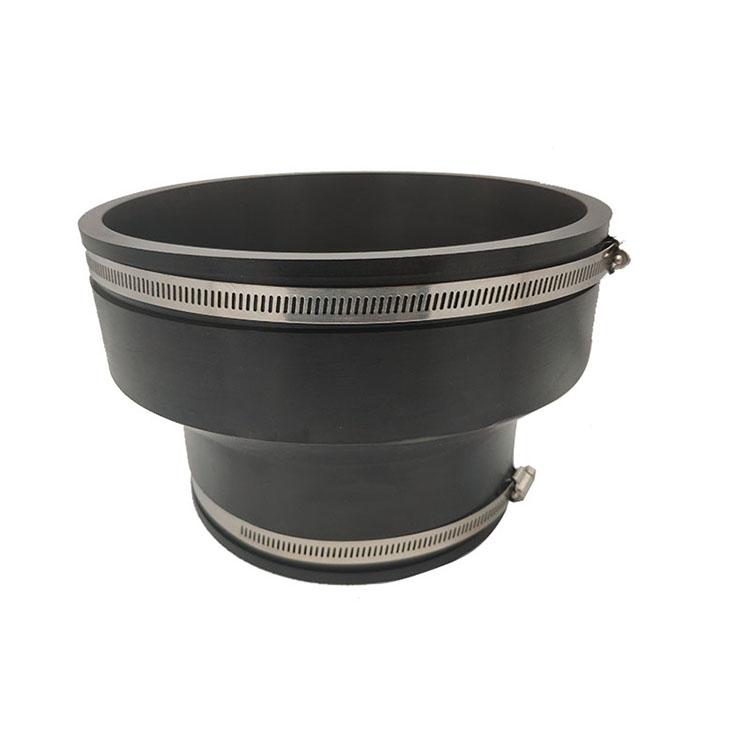
Flexible pipe couplings are designed to adapt to shifting pipes, whether due to temperature changes, ground movement, or vibrations. Made from materials like rubber, PVC, or stainless steel, they create a watertight seal while accommodating flexibility. Over time, these couplings can collect dirt, grease, hard water minerals, or organic growth, especially in humid environments like basements or bathrooms. Ignoring these buildups may lead to reduced water flow, unpleasant odors, or even structural damage. Recognizing the signs of contamination—such as discoloration, foul smells, or visible grime—is the first step toward effective cleaning.
Safety First: Preparing for the Cleaning Process
Before tackling any plumbing maintenance, safety should be a priority. Start by shutting off the water supply to the affected area to avoid accidental spills or pressure-related injuries. Wear protective gear, including gloves and safety goggles, to shield your skin and eyes from harsh chemicals or sharp edges. If the coupling is located in a confined space, ensure proper ventilation to prevent inhaling fumes from cleaning agents. Additionally, place towels or a bucket beneath the coupling to catch drips and protect surfaces from water damage. Taking these precautions sets the stage for a smooth, accident-free cleaning process.
Gathering the Right Tools and Materials
The success of any cleaning task hinges on using appropriate tools. For flexible pipe couplings, you’ll need a few basic items: a soft-bristled brush (an old toothbrush works well), microfiber cloths, a bucket, and mild cleaning solutions. Avoid abrasive scrubbers or steel wool, as they can scratch the coupling’s surface and compromise its seal. For mineral deposits, white vinegar or a commercial descaling solution is effective, while baking soda mixed with water can tackle organic buildup. If the coupling is heavily soiled, a plumber’s snake or flexible wire brush may help dislodge stubborn debris from inside the pipe.
Step-by-Step Cleaning for External Surfaces
Start by wiping down the exterior of the coupling with a damp cloth to remove loose dirt. Next, dip the soft-bristled brush into your chosen cleaning solution and gently scrub the surface in circular motions. Pay close attention to crevices where grime tends to accumulate. For stubborn stains, let the solution sit for 5–10 minutes before scrubbing again. Rinse the coupling thoroughly with clean water, ensuring no residue remains. Dry it completely with a microfiber cloth to prevent water spots or future buildup. This simple routine can restore the coupling’s appearance and functionality without damaging its material.
Addressing Internal Buildup and Blockages
Internal cleaning is crucial if you notice reduced water flow or strange noises coming from the pipes. Begin by disconnecting the coupling from the pipes, if possible, following the manufacturer’s guidelines to avoid damage. Use a plumber’s snake or flexible brush to remove debris from the pipe’s interior. For mineral deposits, fill the pipe with a vinegar-water solution (1:1 ratio) and let it sit for several hours or overnight. Flush the pipe with clean water afterward to wash away loosened particles. Reconnect the coupling securely, ensuring all seals are tight to prevent leaks. Regular internal maintenance can extend the life of both the coupling and the connected pipes.
Natural vs. Chemical Cleaners: Making the Right Choice
Homeowners often debate whether to use natural or chemical cleaners. Natural options like vinegar and baking soda are eco-friendly, affordable, and safe for most materials. They’re particularly effective against mineral deposits and mild mold. Chemical cleaners, on the other hand, may offer faster results for severe buildup but can emit strong fumes and harm the environment if not used properly. Always read labels carefully and test solutions on a small, inconspicuous area first. For those with sensitive skin or respiratory issues, natural cleaners are generally the safer bet.
When to Call a Professional Plumber
While DIY cleaning works for routine maintenance, some situations require expert help. If the coupling is cracked, corroded, or impossible to disconnect, attempting repairs yourself could worsen the problem. Similarly, if you encounter persistent leaks, unusual odors, or signs of mold beyond the coupling’s surface, these may indicate deeper plumbing issues. Professional plumbers have the tools and expertise to diagnose problems accurately and provide lasting solutions. Don’t hesitate to seek help if you’re unsure about any step of the process—it’s better to be safe than sorry.
Final Tips for Long-Term Maintenance
Preventive care is key to minimizing future cleaning efforts. Inspect couplings regularly for signs of wear, such as cracks or loose fittings, and replace them promptly if needed. In areas with hard water, consider installing a water softener to reduce mineral buildup. Keep the surrounding area dry and well-ventilated to discourage mold growth. Finally, schedule annual plumbing inspections to catch potential issues before they escalate. By staying proactive, homeowners can enjoy reliable plumbing with minimal hassle.
Conclusion
Cleaning flexible pipe couplings doesn’t have to be intimidating. With the right tools, safety measures, and a systematic approach, even novice DIYers can tackle this task effectively. Whether opting for natural cleaners or seeking professional assistance when needed, regular maintenance ensures these critical components function smoothly for years to come. By investing a little time and effort, homeowners can protect their plumbing systems and avoid costly repairs down the line.
 How to Create a Proactive Spiral Hydraulic Hose Replacement Plan That Prevents Downtime?
 Is Your Hydraulic System Overstressing? 5 Diagnostic Signs You Need to Upgrade to Spiral Hose
 Is Your Hydraulic System Pushing Limits? When to Specify Spiral Hose vs. Braided?
 Is Your Machinery Demanding More? Why Upgrade to a Spiral Hydraulic Hose?