Practical quality checks for Bridge Bearing Pad procurement: factory testing, material certification, dimensional inspection, and field acceptance criteria for infrastructure buyers.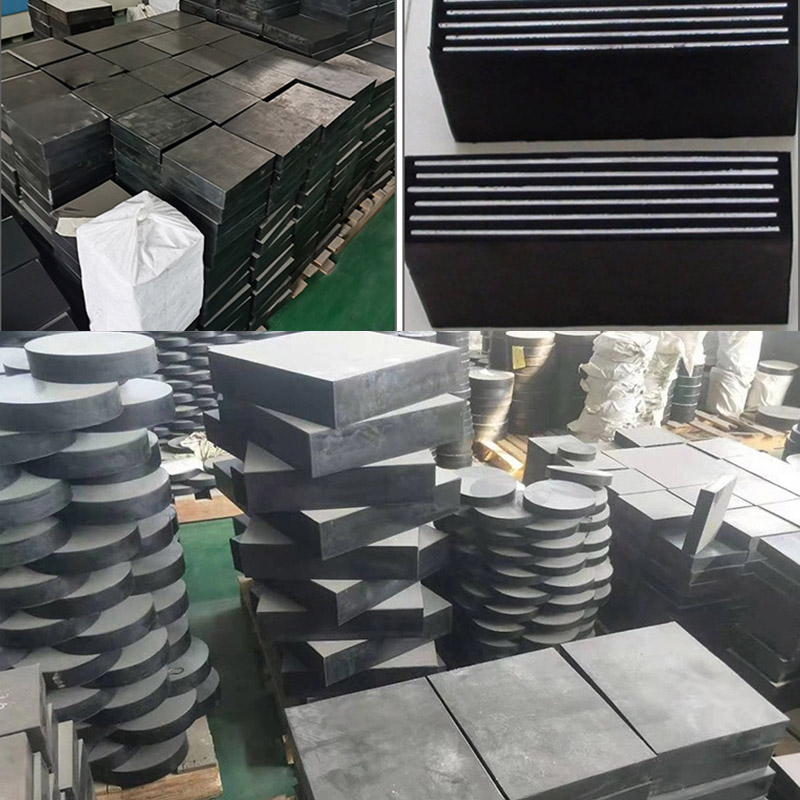
Trusting a Certificate Is Not Enough
Every supplier shipping a Bridge Bearing Pad can provide a certificate. The question is whether that certificate matches the product delivered. In international bridge projects, the gap between what is specified and what arrives at the jobsite is a recurring source of early failures.
This article covers the verification steps that procurement engineers and site inspectors can apply before installation. These checks do not require a laboratory. They require a caliper, a durometer, a straightedge, and knowing what to look for.
Step 1: Material Identification Before UnloadingWhen a shipment arrives, the first check is visual and tactile. Every pad should carry permanent markings per ASTM D4014 or AASHTO M251:
Rubber type (CR for neoprene, NR for natural rubber)
Grade designation (0, 3, or 5)
Batch number
Manufacturer name or logo
Date of manufactureUnmarked pads should be quarantined pending supplier explanation. In one documented case from a Middle East highway project, unmarked pads were later found to be SBR rubber substituted for specified neoprene. The substitution was discovered only after ozone testing was ordered during a dispute.
Step 2: Dimensional VerificationPlan dimensions and thickness tolerances are specified in ASTM D4014:
Length and width: ±2 mm for pads up to 600 mm, ±3 mm for larger sizes
Total thickness: ±1 mm for pads under 50 mm, ±1.5 mm for thicker pads
Shim position: within 2 mm of drawing location
Edge cover: minimum 5 mm for internal shims, 8 mm for external layersMeasure at four points along each edge. Record the minimum and maximum. If thickness varies by more than 1.5 mm across a single pad, the pad may not seat evenly under the girder.Real case:A bridge project in East Africa received 200 pads with thickness ranging from 47 mm to 53 mm against a specified 50 mm. The variation was caused by inconsistent mold clamping during production. Pads installed on adjacent girders created a 6 mm height difference at the deck level, requiring mortar adjustment at every bearing location.
Step 3: Hardness ConfirmationShore A durometer testing per ASTM D2240 should be performed on the pad surface at five locations. Acceptable range is 55 to 70 for standard bridge bearing compounds, with a preferred target of 60±5.
Readings below 50 indicate the pad will deform excessively under load
Readings above 75 indicate the pad will transmit impact forces to the substructureImportant note: Durometer readings on the outer cover layer may differ slightly from the internal laminate hardness due to surface curing effects. If readings fall outside the acceptable range, request a cross-section test from the supplier.
Step 4: Compression Modulus EstimationWhile full-scale compression testing requires a hydraulic press, a field approximation can be made using the pad dimensions and durometer:For a 60 Shore A neoprene pad with shape factor S ≥ 6, the apparent compression modulus Ec is approximately 800 to 1200 MPa. This translates to a vertical deflection of roughly 5% to 8% of total rubber thickness under design load.If the pad feels excessively soft when pressed by hand or shows visible deflection under the weight of a girder before grouting, the compound or shape factor may be incorrect.
Step 5: Visual Inspection for Bond QualityExamine all four vertical faces of each pad for:
Gaps between rubber and steel shim edges
Blisters or bulges on the surface
Exposed shim edges
Foreign material embedded in the rubber
Uneven rubber flow patterns indicating incomplete mold fillAny pad showing bond defects should be rejected. Bond defects cannot be repaired in the field. Attempts to inject adhesive or clamp delaminated edges have a documented history of failure within 12 months.
Real case:
A viaduct project in South America accepted pads with minor edge gaps, assuming they would close under compression. Within two years, moisture entered the gaps, shim corrosion began, and six bearings required emergency replacement. The cost of rejecting those pads at receipt would have been a fraction of the remedial work.
Step 6: Low-Temperature Flexibility Check (If Applicable)
For pads specified as Grade 3 or Grade 5, a simple cold-flex test can be performed on a sample pad or a test strip from the same batch:
Condition the sample at -20°C for 24 hours
Bend the sample 180 degrees around a mandrel with diameter equal to 10 times the sample thickness
Inspect for cracks on the tension surfaceCracking indicates inadequate low-temperature compound formulation. This test is specified in ASTM D4014 and can be performed by any competent materials laboratory.
Step 7: Ozone Resistance VerificationOzone testing per ASTM D1149 requires specialized equipment, but a preliminary assessment can be made:
Examine the pad surface under 10x magnification for existing micro-cracks
Pads stored outdoors for more than 30 days before installation should be inspected carefully
Any pad showing surface cracks before installation will fail faster in serviceIf ozone testing is not feasible locally, request the manufacturer's latest ozone test certificate covering the same compound formulation and production batch.
Step 8: Documentation ReviewBefore signing off on a shipment, collect and verify:
Mill certificate for steel shims confirming ASTM A36 or A1011 grade and galvanization thickness
Rubber compound test report showing tensile strength, elongation, compression set, and hardness
Peel test certificate for rubber-to-steel bond strength
Full-scale compression test report if required by the contract
Batch traceability records linking each pad to its production date and raw material lotsMissing documentation is a red flag. In international procurement, the absence of traceability records has been linked to counterfeit products, expired compound batches, and unauthorized material substitutions.
Step 9: Sampling Protocol for Large OrdersFor orders exceeding 100 pads, implement a stratified sampling plan:
Test 5% of pads for dimensional compliance
Test 2% for durometer
Select one pad per 50 for destructive bond testing (this pad is sacrificed)
Retain one pad per 100 as a reference sample for future comparisonDocument all results and photograph any non-conforming units. Share findings with the supplier promptly to allow correction before the next shipment.What to SpecA Bridge Bearing Pad is only as reliable as the verification process applied before installation. Factory certificates confirm intent. Field inspection confirms reality. Dimensional measurement, hardness testing, visual bond inspection, and documentation review are low-cost checks that prevent high-cost failures. Include these verification steps in your procurement checklist and enforce them at receipt. The 30-year service life starts with the 30-minute inspection at the jobsite gate.

 Why Do Some Bridge Bearing Pads Fail in Five Years While Others Last Fifty? A Root-Cause Analysis
 How Much Load Can a Bridge Bearing Pad Actually Carry? Engineering Data for Safe Girder Support
 Is Your Bridge Bearing Pad Specified for the Wrong Rubber Grade? Why Elastomeric Bridge Bearing Pad Selection Decides 50-Year Deck Life
 Can a Loading Dock Bumper Survive -30°C Winters and +50°C Summers? Here Is the Extreme-Weather Data