
Plumbing repairs can be daunting, especially when dealing with leaks, pipe replacements, or system maintenance. Whether you’re a DIY enthusiast or a professional plumber, having the right tools simplifies the process. One often-overlooked yet indispensable tool is the rubber service plug, a flexible, durable solution designed to temporarily seal pipes, drains, or fixtures during repairs. This guide explores how to use these plugs effectively, their benefits, and scenarios where they shine.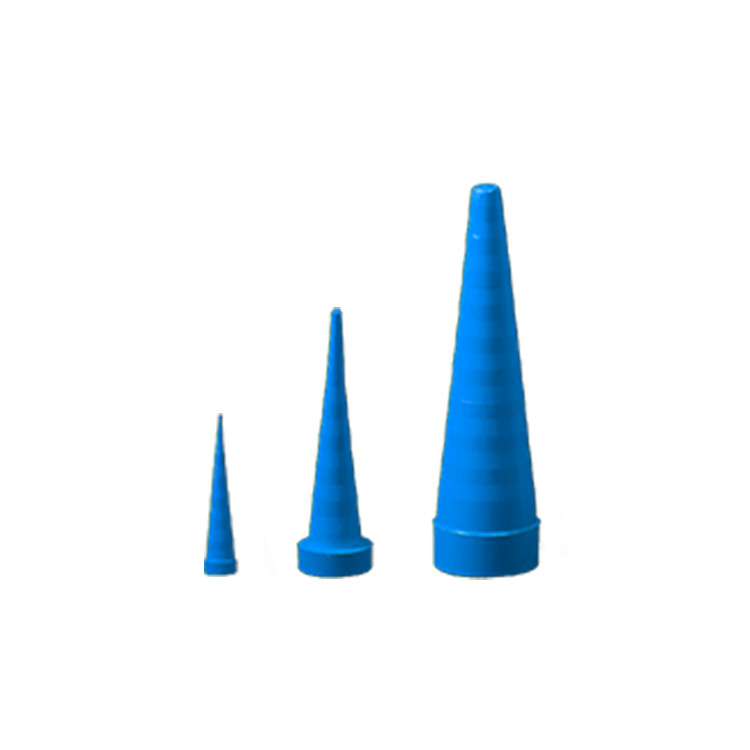
Why Rubber Service Plugs Are Essential for Plumbing Repairs
When working on plumbing systems, controlling water flow is critical. Traditional methods like stuffing rags into pipes or using makeshift caps often fail, leading to messy spills or incomplete seals. Rubber service plugs offer a reliable alternative. Made from high-quality, waterproof rubber, these rubber seal plugs create an airtight and watertight seal, preventing leaks while you work. Their flexibility allows them to conform to irregular pipe shapes, making them versatile for residential and commercial projects.
Unlike permanent fixtures, rubber plugs are designed for temporary use. This means you can install and remove them quickly without damaging pipes. Their reusable nature also makes them cost-effective over time, reducing the need for disposable materials.
When to Use Rubber Service Plugs
Rubber service plugs are ideal for a variety of plumbing scenarios:
Pipe Repairs or Replacements: Before cutting or soldering pipes, use a plug to block water flow and prevent flooding.
Drain Maintenance: Temporarily seal sink or shower drains to test for leaks or clean debris without water interference.
Fixture Installations: Block water supply lines when installing new faucets, toilets, or appliances.
Emergency Leaks: Quickly stop water from escaping a damaged pipe until a permanent fix can be made.
Winterization: Seal outdoor spigots or unused pipes to prevent freezing and bursting during cold months.
Their adaptability means they work on pipes of varying sizes and materials, including PVC, copper, and galvanized steel.
How to Choose the Right Rubber Service Plug
Selecting the correct rubber seal plug ensures a secure fit and prevents leaks. Here’s what to consider:
Size: Measure the pipe’s inner diameter (ID) or outer diameter (OD) to match the rubber plug’s dimensions. Most plugs are labeled with size ranges.
Shape: Standard plugs work for straight pipes, while tapered or ribbed designs may fit irregular openings better.
Material: Opt for food-grade rubber if the rubber service plug will contact potable water, though most plumbing plugs are made from non-toxic, durable compounds.
Temperature Resistance: If working in extreme temperatures (e.g., near boilers or outdoor pipes), choose a plug rated for high or low heat.
Many hardware stores and online retailers offer kits with multiple sizes, ensuring you have the right tool for unexpected repairs.
Step-by-Step Guide to Installing Rubber Service Plugs
Prepare the Area: Turn off the water supply and drain any remaining water from the pipe.
Select the Plug: Choose a rubber plug slightly larger than the pipe’s opening for a snug fit.
Lubricate (Optional): Apply a small amount of dish soap or silicone grease to the rubber plug’s edges to ease insertion.
Insert the Plug: Press the rubber service plug firmly into the pipe, twisting slightly if needed to create a seal. For tapered rubber seal plugs, push until the wider end sits flush with the pipe.
Test the Seal: Turn on the water supply briefly to check for leaks. Tighten the plug if necessary.
Complete Repairs: Proceed with your plumbing task, knowing the area is protected from water.
Remove the Plug: Gently twist and pull the service plug out once repairs are finished. Clean and store it for future use.
Common Mistakes to Avoid
Even experienced DIYers can make errors when using rubber plugs. Here’s how to sidestep common pitfalls:
Using the Wrong Size: A plug that’s too small won’t seal, while one that’s too large may not fit. Always double-check measurements.
Over-Tightening: Forcing a plug into place can damage the rubber or the pipe. Apply steady pressure instead of brute force.
Neglecting Leaks: If water seeps around the rubber seal plug, reposition it or use a larger size. Never ignore persistent leaks, as they can worsen over time.
Reusing Damaged Plugs: Tears, cracks, or hardened rubber compromise the seal. Inspect plugs before each use and replace them if worn.
Beyond Plumbing: Creative Uses for Rubber Service Plugs
While primarily designed for pipes, rubber plugs have surprising secondary applications:
Garden Hose Seals: Temporarily block hoses to test for leaks or store them during winter.
Aquarium Maintenance: Seal filter tubes or overflow drains when cleaning tanks.
DIY Projects: Use plugs to cap PVC pipes during craft projects or to seal containers temporarily.
Automotive Repairs: Block radiator hoses or fuel lines when working on vehicles (ensure compatibility with fluids).
Their versatility makes them a handy addition to any toolbox, even outside plumbing tasks.
Final Tips for Long-Term Success
To maximize the lifespan of your rubber service plugs:
Store them in a cool, dry place away from direct sunlight to prevent cracking.
Avoid contact with sharp tools or abrasive surfaces that could puncture the rubber.
Clean service plugs with mild soap and water after each use to remove debris or residue.
Rotate your service plugs regularly if you own multiple sizes, distributing wear evenly.
Conclusion
Rubber service plugs are a simple yet powerful tool for plumbing repairs, offering convenience, safety, and cost savings. By understanding their applications, selecting the right size, and following proper installation techniques, you can tackle leaks, pipe replacements, and maintenance tasks with confidence. Whether you’re a homeowner or a professional, keeping a set of these plugs in your toolkit ensures you’re always prepared for plumbing challenges—big or small.
 Steel-Faced Laminated Rubber Bumper: 5 Field Problems Buyers Keep Finding After Installation
 Rubber Laminated Loading Dock Bumper with Steel Angle: 5 Field Failure Signs That Point Back to the RFQ
 Bridge Bearing Pad Field Failure: 5 Visual Signs Before It Retires (And What Caused It)
 Bridge Bearing Pad RFQ Checklist: 9 Lines That Stop Suppliers From Subbing the Rubber